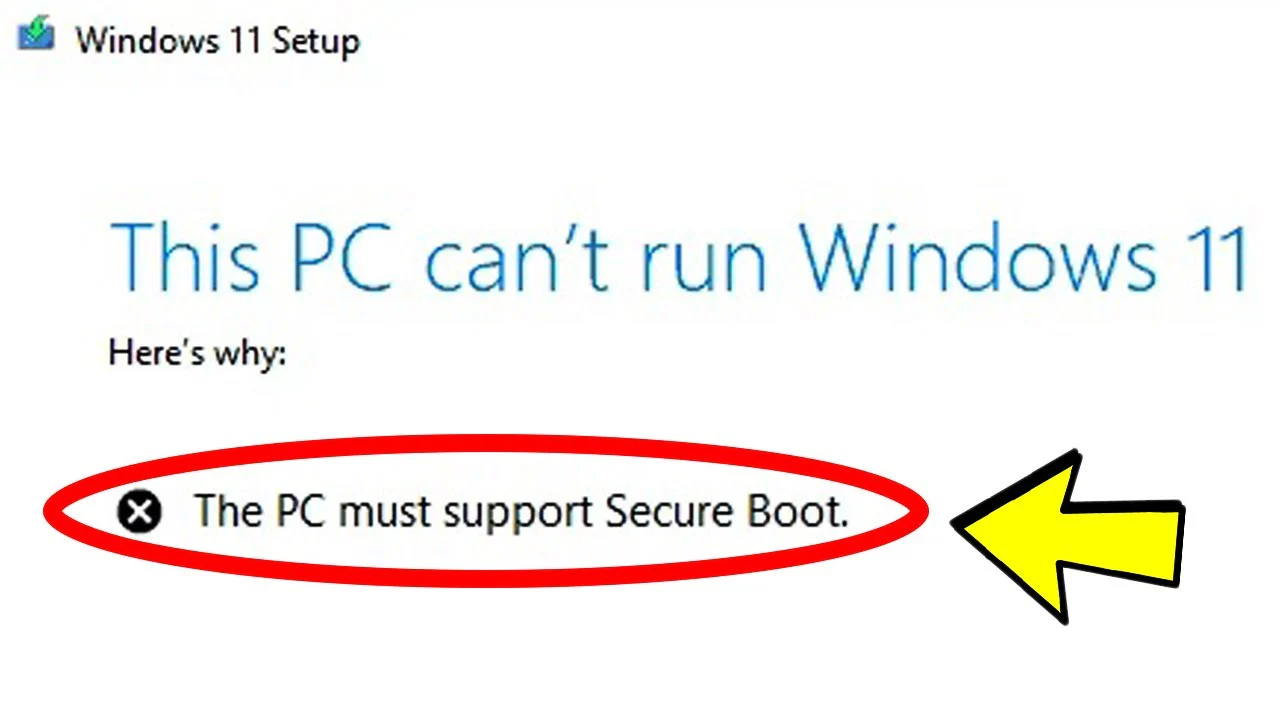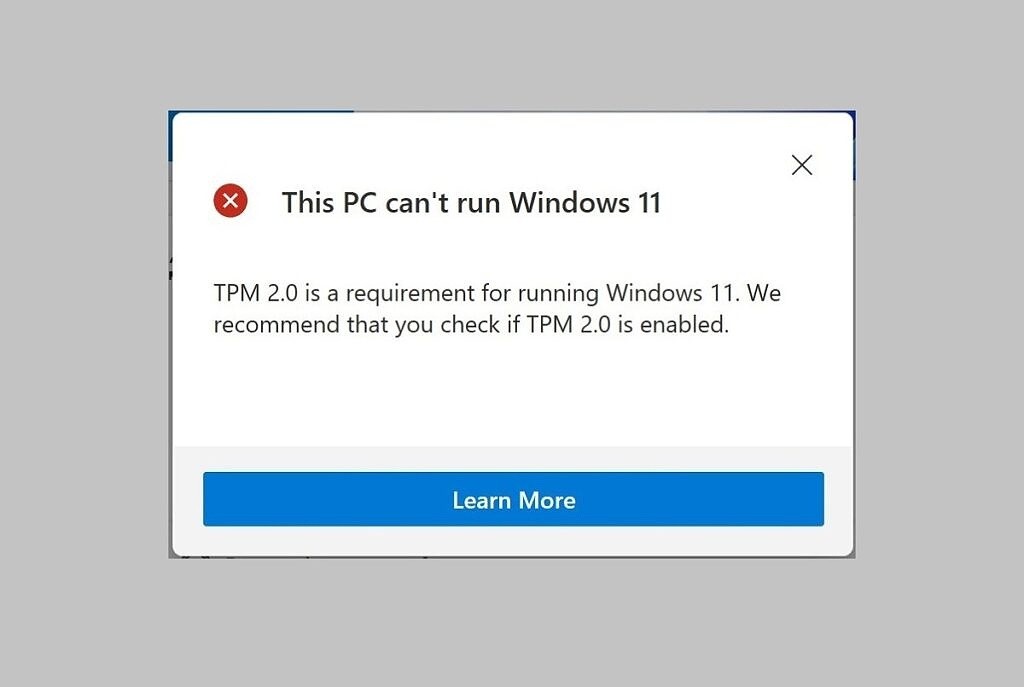
Windows 11 is on the horizon and it brings a lot of changes to the Windows Operating System. For security purposes, there is a new Windows 11 TPM 2.0 requirement. There’s been lots of discussions and confusion since Microsoft’s announcement about this requirement. TPM 2.0 has been a hardware requirement for PCs manufactured since 2016, but it hasn’t been enforced by Windows. Windows 11 is changing that and will require TPM 2.0 and require it to be active. TPM 2.0 is an additional hardware chip in the computer that adds additional hardware-based security to your system. While this is usually a good thing, it also means that Windows 11 won’t run on older hardware unless there are workarounds or Microsoft relaxes this requirement.
If your PC has TPM but has it deactivated, you’ll need to go into the BIOS and enable it.
How to Enabled Windows 11 TPM 2.0 in BIOS
This process varies between different hardware manufacturers, but the basic steps below should point you in the right direction.
- Restart your laptop
- Hold down the F2 key (or FN F2) during boot up to get to the BIOS menu
- Navigate to the Security tab
- Look for TPM, Intel Platform Trust Technology (IPTT) or AMD CPU fTPM
- Switch it to “Enabled”
- Hit F10 to Save and Exit BIOS
In Windows 10, you can also go to Settings > Update & Security > Recovery and select Restart Now under Advanced Startup. Then you’ll go to Troubleshoot > Advanced Options > UEFI Firmware Settings > Restart to get into the BIOS.
You can verify TPM 2.0 by opening a run command and typing in tpm.msc. You’ll be able to view the version and if it is activated or if there are any other issues with the chip.