Windows 11 can suffer from slow performance issues just like previous versions of Windows. There are a few things you can do as a user to help speed up Windows 11 slow performance. For starters, you’ll want to have all Windows Updates installed and have all of your drivers updated. For your drivers, you’ll want to check your PC manufacturer’s website for the latest versions. There are also the hardware recommendations like adding additional RAM (memory), making sure you’re using an SSD instead of an older hard drive, or even upgrading your processor if you can. We won’t cover those in this article since not every system can be upgraded and every system is different. Instead, we’ll cover some of the things you can try within the operating system to speed up Windows 11.
Set a Static Pagefile in Windows 11
This tip greatly helped the performance of Windows 10, but it can also help fix Windows 11 slow performance. In this step, you’ll set the the Initial Size and Maximum Size to the Recommended File Size for both.
- Click on Start and type “Performance” and click on “Adjust the appearance and performance of Windows“
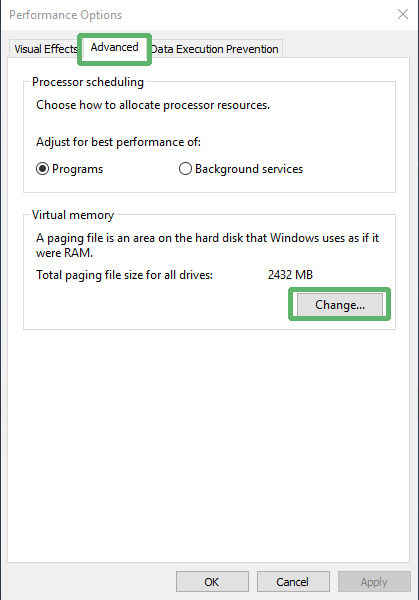
- Go to the Advanced tab and click on Change in the Virtual Memory section.
- Now uncheck the option Automatically manage paging file size for all drives.
- Select the C: drive where Windows 11 is installed and then choose Custom Size. If you have a 2nd hard drive, then disable the Page File on your C: drive and enable it on your 2nd drive and set that one to Custom Size. Then change Initial Size and Maximum Size to the Recommended Values by Windows which is in the Total Paging File Size For All Drives section (as seen below).
- NOTE: Your recommended value will be different than the image below, use whatever your’s shows
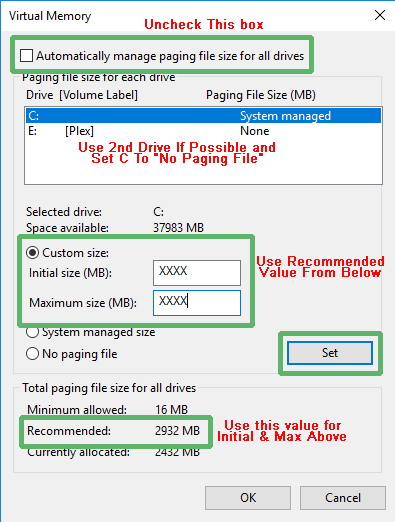
- Now click Set and then hit OK to save the settings.
- Reboot the computer for the changes to take effect and fix the Windows 11 slow performance issues.
If you experience worse performance, you can go back into this setting and change it back to System Managed Size. For a technical explanation for the page file, Microsoft published the Introduction to the Page File.
Disable Some Visual Effects in Windows 11
This tip is another one that’s been around since Windows XP, but it still applies today with Windows 11 and I do it on every system I use. Some of the visual effects and cause slow performance, especially if you have limited RAM or an older graphics card.
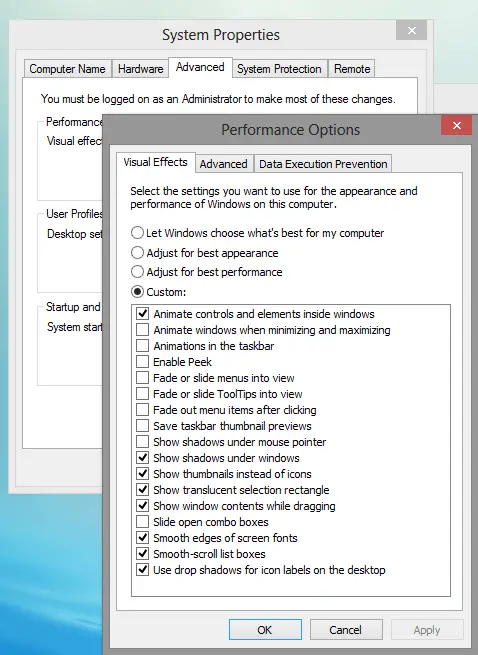
Click on Start and type “Performance” and click on “Adjust the appearance and performance of Windows”
I always uncheck the following:
- Animate windows when minimizing and maximizing
- Animations in the taskbar
- Enable Peek (sometimes I leave this one on)
- Fade or slide menus into view
- Fade or slide ToolTips into view
- Fade out menu items after click
- Slide open combo boxes
Free Up Disk Space
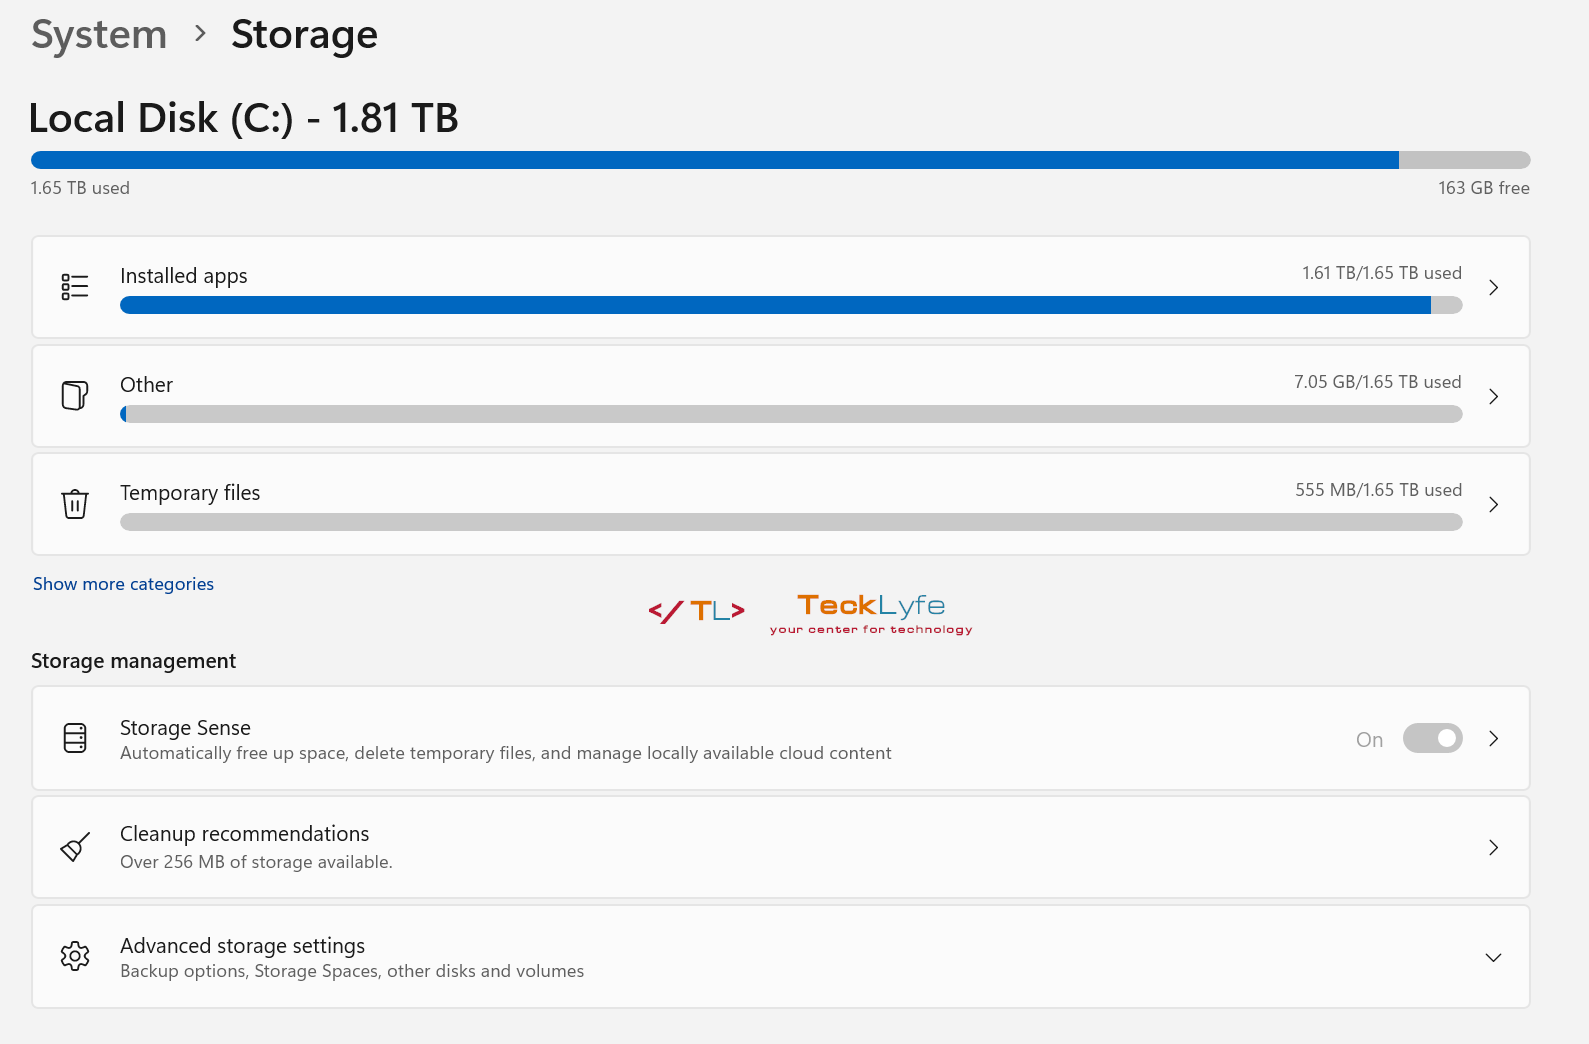
Keeping your disk clean of temporary files and other unused files can also help speed up Windows 11. The typical recommendation is to keep 90% of your disk space free for performance. If you’re reaching that threshold, the quickest way to free up space is to uninstall any large and unused applications. You can go to Settings > System > Storage > Installed Apps and sort by Size (Large to Small).
You’ll also want to run the disk cleanup tool and utilize Storage Sense. You can find more information about these tools here: How to Free Up Disk Space in Windows 11
Disable Unnecessary Startup Apps
When you install an application, some of them automatically run when you turn on your computer and login. These programs can take up precious resources since they’re always running in the background.
- Click on Start and search for Task Manager
- On the left, click on Startup Apps
- Click on the Status column to sort and get Enabled listed first
- Go through the list and if there are apps you don’t need running in the background, right-click on it and select Disable
Now when you restart your computer, those apps won’t be running unless you manually start them.