Everything seems to be moving to “the cloud” these days, and you have a few options such as Microsoft Azure and Amazon AWS to name a few. Depending on your needs, these cloud services can offer a huge number of services ranging from basic web applications all the way to a complete IT infrastructure setup. If you’re using an Azure Web App to host your website, you’ll probably want to bind an SSL certificate to it for security reasons. In future releases of Google Chrome, Firefox, and other major browsers, they’ll soon start flagging HTTP sites as Not Secure, which will deter your visitors from going to your website. This is why having a trusted SSL certificate for all of your websites is important.
In this article, we’ll walk through the steps to setup a free Let’s Encrypt SSL certificate with an Azure Web App. Let’s Encrypt is an excellent free service that offers trusted SSL certificates to the masses. Before Let’s Encrypt, other SSL certificate vendors would charge thousands of dollars. Let’s Encrypt offers their service free of charge with the caveat of having the certificate expire every 90 days. While this might seem like a nuisance, there are plenty of ways to automate the renewal process, including an Azure Web App. Microsoft is always changing the Azure Portal, so we’ll try to keep this article up-to-date if any of the steps change.
Before You Get Started
We won’t go through the details of setting up an Azure Web App. You’ll want to make sure you have a Resource Group created and you’ll need to know the name of that Resource Group in later steps.
APP SERVICE PLAN
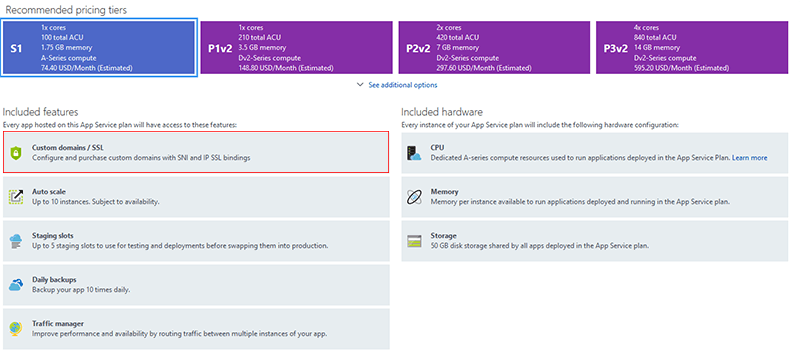
Depending on the App Service Plan you started off with, you’ll want to check that the plan offers “Custom Domains/SSL“. You can select the Scale Up (App Service Plan) from your App Service menu if you need to check or change your plan. As of this article, all Production App Service Plans include this feature and for Dev/Test plans, level B1 or higher will work.
CUSTOM DOMAIN
If you haven’t done so already, you’ll want to head into the Custom Domains menu for your App Service and add your custom domain (hostname). You’ll need to create some DNS records to verify it, and those instructions will vary depending on where you manage your DNS records.
STORAGE ACCOUNT
If you want to take advantage of the automatic renewal in the Let’s Encrypt Site Extension we’ll be using, you’ll need to have a Storage Account created within your Resource Group. In your Resource Group, click Add and search for storage account and select Storage Account – Blob, File, Table, Queue then click Create. Give it a unique name and you can keep all of the other settings as their defaults. For Resource Group, you’ll want to click Use Existing and select the same Resource Group as your App Service.
Link Your Storage Account To Your App Service
- In your Storage Account, click on Access Keys and you’ll want to copy the Connection String for key1
- Now go to your App Service and go to Application Settings. Scroll down to Application Settings and click Add New Setting
- You’ll need to add two. The names will be AzureWebJobsStorage and AzureWebJobsDashboard
- The Value for both will be the Connection String you copied from your Storage account and should look something like this:
DefaultEndpointsProtocol=https;AccountName={storage account name};AccountKey={storage account key} - Click Save at the top
Create a Service Principal / App Registration
For this step, you’ll need to go into the Azure Active Directory menu in the Azure Portal.
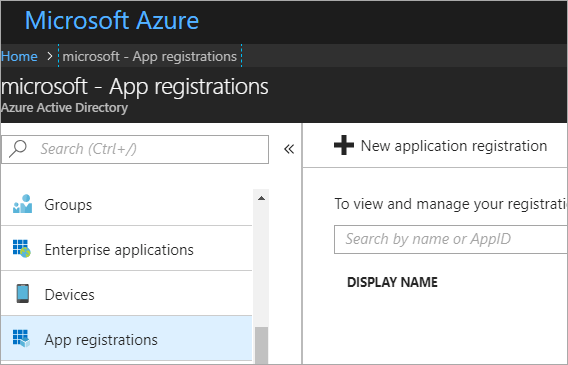
Then click on App Registrations and New Application Registration.
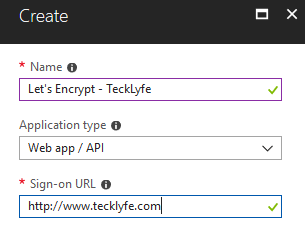
Give it a name and use your Custom Domain as the Sign-On URL.

Copy the Application ID (where the black box is in the image above).
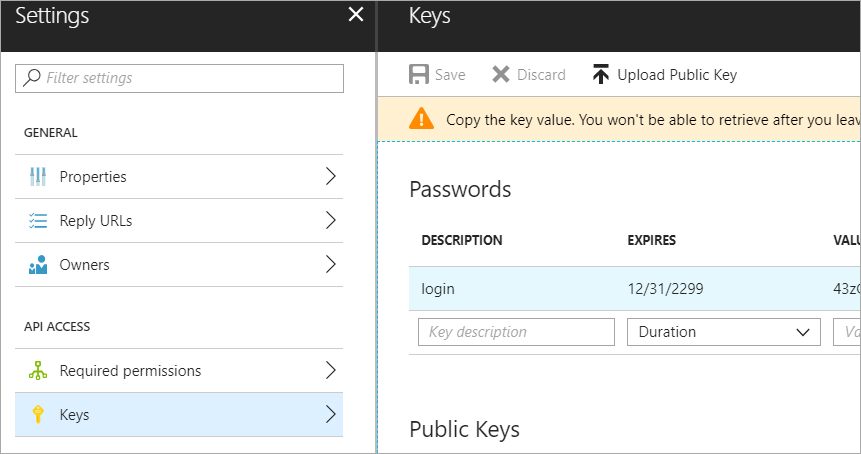
Click Settings > Keys and create a new key with the description of login and an Expires Duration of Never. Click Save then copy the Key Value to a safe location because you’ll never see that key again and we’ll need it later.
Assign The App Service Contributor Role Permissions
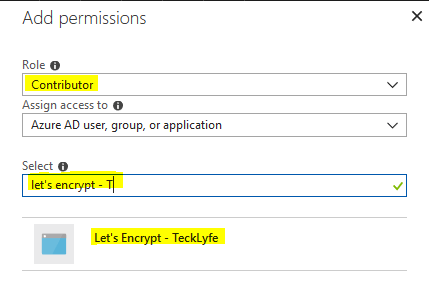
In the Azure Portal, go to Resource Groups and click into the Resource Group you’re using for your App Service. Click Access Control (IAM) and click Add. Change the Role to Contributor and in Select type in the name of your App Registration, click on it and Save.
Create The Let’s Encrypt Site Extension
Now let’s browse to your Resource Group > Your App Service (Web App) > Scroll down to Extensions under Development Tools. Click Add then look for Azure Let’s Encrypt. If you select the No Web Jobs options, you won’t be able to setup the automatic renewal, so select the one that just says Azure Let’s Encrypt.
Next, head over to your Overview section of your Web App and you’ll need to click the Restart button at the top to restart your web app. The web app needs to be restarted before you can browse to the Let’s Encrypt Site Extension in the next step.
CONFIGURE THE LET’S ENCRYPT SITE EXTENSION
Now we’ll need to configure the Site Extension. Click on the Azure Let’s Encrypt Site Extension then click Browse and it’ll open an Authentication Settings page with some boxes to fill in.
- Tenant – This is the name you created when you setup your Azure subscription.
- SubscriptionID – You can find this by searching the Azure Portal for Subscriptions, then select the Subscription ID that matches the one where your Resource Group is.
- ClientID – This is the Application ID of the App Registration you made in Azure Active Directory
- ClientSecret – This is the login key you created for your App Registration. If you didn’t save this, you’ll need to delete the one you setup and create a new one since you can’t view it after the initial setup.
- ResourceGroupName – This is the name of the Resource Group where your App Service is.
- ServicePlanResourceGroup – This is the same as above assuming you created your Service Plan in the same Resource Group.
- UseIPBasedSSL – Leave unchecked
- WebAppName – Filled in by default
- SiteSlotName – Leave blank
- Update Application Settings – Check this box
Click Next, then select all of the hostnames you want to get a certificate for and click Request and Install Certificate (you can hold down CTRL if you need to select multiple hostnames).
Bind The SSL Certificate To Your Web App Service
Head back to the Azure Portal and navigate to Resource Groups > Your Resource Group > Your App Service and select SSL Settings from the menu.
You can turn on HTTPS Only and set the minimum TLS version (1.2 is recommended but will be incompatible with older browsers).
Under SSL Bindings:
- Click Add SSL Binding
- Select your hostname from the dropdown
- Select the Private Certificate Thumbprint from the dropdown (if it doesn’t show up, then the hostname isn’t matching your Let’s Encrypt certificate from one of the steps above)
- Select the SSL Type to SNI SSL
*If you need a static IP address for your Azure Web App, you must be on a Production App Service Plan and you can select IP Based SSL instead of SNI SSL. Then Azure will assign your web app a static IP. - Click Add Binding
Final Thoughts
This walkthrough is very detailed and contains a lot of steps, but once you get the Let’s Encrypt certificate configured correctly, you shouldn’t have to go through these steps again unless you change your hostname or domain. As always, if you have any issues following the steps above, please leave a comment below and we can try to assist.