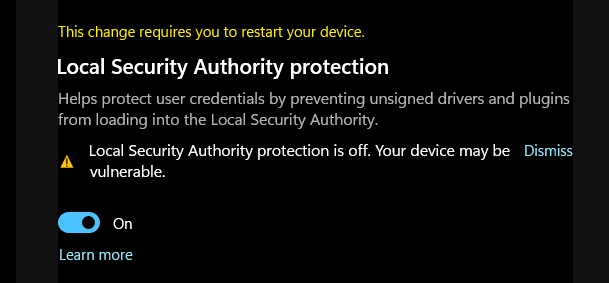
Windows 11 has recently introduced a bug that reports the LSAP Local Security Authority protection is disabled even though it is enabled in the settings. A recent update to the Windows Security App appears to have removed the option from the GUI. If you previously had LSAP enabled, it will remain enabled, but due to the update you can no longer see the status.
Microsoft has released a statement as of March 21, 2023:
After installing “Update for Microsoft Defender Antivirus antimalware platform – KB5007651 (Version 1.0.2302.21002)”, you might receive a security notification or warning stating that “Local Security protection is off. Your device may be vulnerable.” and once protections are enabled, your Windows device might persistently prompt that a restart is required. Important: This issue affects only “Update for Microsoft Defender Antivirus antimalware platform – KB5007651 (Version 1.0.2302.21002)”. All other Windows updates released on March 14, 2023 for affected platforms (KB5023706 and KB5023698), do not cause this issue.
Workaround: If you have enabled Local Security Authority (LSA) protection and have restarted your device at least once, you can dismiss warning notifications and ignore any additional notifications prompting for a restart. You can verify that LSA protection is enabled by looking in Event Viewer using the information available here. Important: Currently, we do not recommend any other workaround for this issue.
Next steps: We are working on a resolution and will provide an update as soon as it is available.
WARNING: Please only perform the following steps if you’re familiar with the settings. You can read more about Windows Virtualization-Based Protection.
Fix LSAP Setting in Windows 11 via Registry
- To verify your registry settings, run regedit.exe as an administrator
- Navigate to HKEY_LOCAL_MACHINE\SYSTEM\CurrentControlSet\Control\Lsa
- Look for these keys or add them as DWORD values:
RunAsPPLBoot value of 2
RunAsPPL value of 2 - Navigate to HKEY_LOCAL_MACHINE\SYSTEM\CurrentControlSet\Control\DeviceGuard
- Edit or create the DWORD key EnableVirtualizationBasedSecurity with a value of 1
- Restart your computer
Fix LSAP Setting in Windows 11 via Group Policy
- Run gpedit.msc as an administrator
- Navigate to Computer Config > Administrative > System > Device Guard
- Go to Turn on Virtualization Based Security and edit the settings
- Restart your computer