If you’re managing a company’s iPhone fleet, there may be a time where you need to get an iPhone into supervised mode but don’t want to lose the user’s data by wiping the device. Depending on your setup, some of the steps in this article may vary, but I have gone through these steps using an iPhone 8 on iOS 12. There are quite a few articles that show up when searching this topic, but most of them are out of date.
What You Need
To get started, you’ll need:
- The phone you want to supervise (we’ll be calling that iPhone A in this article).
You DO NOT want this phone’s serial number in Apple Business Manager (DEP) yet. - A temporary phone that you can wipe (we’ll be calling that iPhone B in this article).
- A Mac with Configurator 2 installed on it.
- An Apple Business account at business.apple.com.
- An MDM solution if needed. Highly recommended. I’ll be referring to Microsoft Intune in this article.
If your user is going from an old phone to a new phone, then you don’t need the temporary Phone B because restoring a backup from their old phone to iPhone A should allow you to supervise it.
The reason you need a temporary phone is because of a security feature Apple has in place. If you supervise a phone, then restore a previous unsupervised backup of that same phone, it’ll put it back into unsupervised mode. If you restore the backup from a different device, the phone will remain supervised even if that backup was unsupervised.
Create A Backup & Restore It
Once you have the prerequisites above, you’ll want to get a current backup of iPhone A. This can be either an iCloud backup or an iTunes backup. An iTunes backup may be easier so you don’t need to sign in with an Apple ID.
Now that you have a good backup of iPhone A, you’ll want to wipe iPhone B and restore that backup to it during setup. As you go through the Setup Assistant, select the option to restore from an iCloud Backup or from an iTunes Backup depending on which method you used in the last step. Wait for that restore to complete before moving onto the next step.
Once your restore has been completed on iPhone B, you’ll want to backup iPhone B either using iCloud or iTunes and wait for it to complete before moving onto the next steps.
Supervise iPhone A
This step can vary depending on your setup. To manually add iPhone A’s serial number into the Apple Business Manager (DEP), you’ll want to use Apple Configurator 2 on a Mac.
- Start Configurator 2 on the Mac.
- Connect iPhone A and wait for it to appear in Configurator.
- Click on the Prepare button and check the option to add it to the Device Enrollment Program and also Supervise Devices. If you’re not using the Device Enrollment Program (DEP), then only check Supervise Devices.
- Select the MDM Server or create a new one if you’re using DEP.
- Select the Organization to supervise the iPhone or create a new one.
- Select the steps to show during the Setup Assistant. If you used an iCloud backup in the previous steps, keep Apple ID checked.
- Choose the Network Profile if needed. If you’ll be using a SIM and cellular data you can skip this step.
- Enter the username and password for your MDM enrollment if needed.
- Click Prepare and follow any remaining prompts
- While going through the Setup Assistant on iPhone A, DO NOT restore from a backup yet, instead select Setup As A New iPhone
Supervise with MDM
If you’re using an MDM solution, you’ll want to setup the iPhone to get supervised and connected with that MDM solution. You’ll need to setup your MDM Server at business.apple.com.
Once your MDM Server is setup in Apple Business Manager, click on Device Assignments, then click on Search Devices. I didn’t have any luck using the serial number lookup, Order Number, or CSV on the main page, so click on the Search Devices button at the top of the page and type iPhone A’s serial number. Once found, select your MDM Server in the Assigned To dropdown box. This will move it from Apple Configurator to your MDM Server.
Finish Setting Up iPhone A
Depending on your MDM solution, you might also need to allow iPhone A’s serial number to enroll through DEP and setup an enrollment profile. You’ll also need an Apple Push Certificate configured with your MDM. Please refer to your MDM documentation for these steps.
Now that iPhone A’s serial number has been assigned to your MDM Server in the Apple Business Manager, you can wipe iPhone A again. While going through the Setup Assistant, you can select the option to Restore From Backup and restore it from iPhone B’s backup. It is important that you restore it from iPhone B and not from an older iPhone A backup. If you restore it from an iPhone A backup, you’ll unsupervise the phone again.
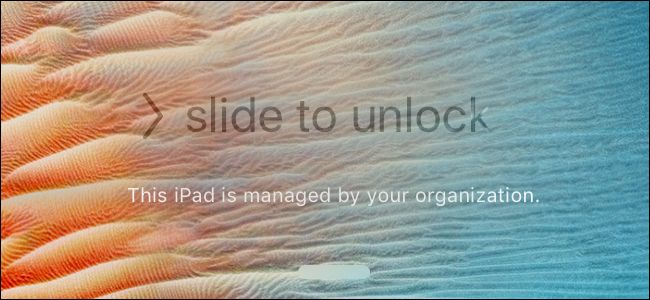
Since you have iPhone A in DEP and it is assigned to an MDM Server, you should be prompted to install Remote Management during the Setup Assistant. Once the restore is complete and it is enrolled with your MDM, you should see a “This device is managed remotely” message at the bottom of the lockscreen. If you go into Settings, it should read “This iPhone is supervised and managed by
Final Thoughts
I’ve gone through the steps above and have successfully supervised and managed an iPhone 8 running iOS 12, but as we all know, technology is constantly changing, so if you’ve gone through the steps above and haven’t been able to supervise your iPhone, please leave a comment below and we’ll try to assist you on any of the steps.