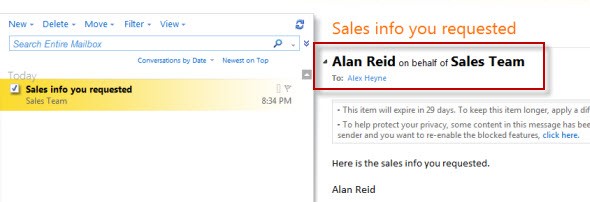
If you’re a Microsoft Exchange administrator, you might have come across a request from a user wanting to either Send On Behalf of a Distribution Group they’re a member of, or even Send As the Distribution Group. Both requests aren’t too difficult to configure, but there’s not an option to do it from within the Exchange Management Console. For Send On Behalf permissions, you’ll need to use the Exchange Management Shell, whereas Send As permissions are setup through Active Directory Users and Computers.
Send On Behalf
To enable send on behalf permissions for a distribution group you need to use the Exchange Management Shell. Launch the shell and use the Set-DistributionGroup command to set the permissions, for example:
Set-DistributionGroup "Distribution Group Name" -GrantSendOnBehalfTo username
You’ll replace Distribution Group Name with the actual name of your group. You’ll replace username with the email username of the user you want to grant the Send On Behalf permissions to.
You can also grant the send on behalf permission to all members of the group using the command below:
Set-DistributionGroup "Distribution Group Name" -GrantSendOnBehalfTo "Distribution Group Name"
It is important to note that if you try to assign the permissions to another group, you’ll overwrite the old group. If you want to add multiple groups, you can checkout the article by ExchangeServerPro.
Send As
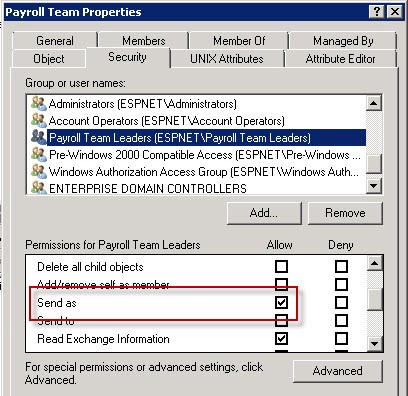
To enable send as permissions, you’ll want to log into your Domain Controller and open up Active Directory Users & Computers.
Open the properties of the group, switch to the Security tab, add the mailbox user or group, and then check the Send As box and apply the change.

You can also use this code in the Exchange Management Shell:
Get-DistributionGroup "Group" | Add-ADPermission -User "User" -ExtendedRights "Send As"
After making this change you may notice that it does not take effect for up to 2 hours. This is due to caching on the Exchange servers. With approved downtime, you could restart the Information Store, but usually isn’t a reasonable option during business hours in a production environment.
You can also run these commands in Exchange Management Shell to push the changes through:
Get-AddressList | Update-AddressList

Get-GlobalAddressList | Update-GlobalAddressList

Get-OfflineAddressBook | Update-OfflineAddressBook


