If you’re a blogger or a web developer, there will hopefully come a time when you out-grow a shared host and need either a VPS or a dedicated server to run your website. In this article, I’ll walk you through the steps to do a LEMP install on Ubuntu 16.04 Server. A LEMP install will get you setup with NGINX as the web server running with PHP7 and MySQL for the database server. PHP7 should be remarkably faster than PHP5 was, and it’ll have the OPcache module installed and turned on by default, which will speed things up even more.
ALSO READ: TECKLYFE – LEMP Install NGINX PHP7 MySQL on CentOS 7 / RHEL / Fedora
Getting Started
The first step you’ll need to do is get a server setup somewhere with Ubuntu 16.04. You could go the cloud route with Azure or Amazon AWS, or find another hosting company that’ll setup the server for you. This article will assume you know some Debian Linux basics like using SSH and apt-get.
When you install your server, you’ll want to check for updates which will get your server patched. For this, you’ll want to run the following two commands:
sudo apt-get update

sudo apt-get upgrade
LEMP Install Components
Install NGINX
We’re going to install the nginx-extras from the Ubuntu repo so we can take advantage of FastCGI Cache and the ability to purge the cache using the nginx helper WordPress plugin.
sudo apt-get install nginx-extras
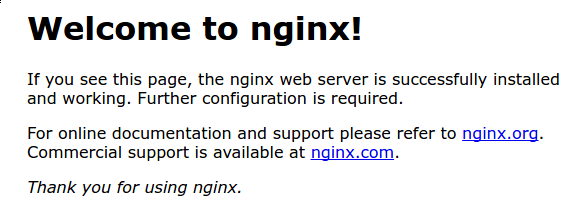
If you browse to your public IP address from a browser, you should see a page similar to this:

You’ll want to follow the steps I outlined in my article How To Upgrade NGINX To Latest Stable Version On Ubuntu to upgrade NGINX to the latest version since the Ubuntu repo isn’t updated very often.
Install MySQL
sudo apt-get install mysql-server
You’ll be asked to configure a root password for the MySQL Server.
After the initial install, you’ll want to run through the secure install script for MySQL:
sudo mysql_secure_installation
Install PHP7
You’ll want to run these 3 commands to get PHP7 installed with some extra modules. A few are needed later if you decide to install PHPMyAdmin.
sudo apt-get install php7.0-fpm php7.0-mbstring php7.0-xml php7.0-mysql php7.0-common php7.0-gd php7.0-json php7.0-cli php7.0-curl

sudo phpenmod mcrypt

sudo phpenmod mbstring
Now we need to secure PHP7 since it has a small loop for hackers by default and we need to edit the PHP.ini file. We can use any of text editor like nano or vim.
sudo nano /etc/php/7.0/fpm/php.ini
Now find cgi.fix_pathinfo. Use Ctrl+W to activate search function in nano editor. Now you will see that its value is set to 1 by default like this cgi.fix_pathinfo=1, so change its value to 0 like this: cgi.fix_pathinfo=0 and save it via Ctrl+O.
Install Postfix (optional)
Installing Postfix will setup an SMTP server for you, so if you’re running a WordPress site, you’ll get Forgot Password emails and emails from your contact forms.
sudo apt-get install postfix
ALSO READ: TECKLYFE – HTTP/2, HTTPS, Let’s Encrypt, NGINX and WordPress Hardening
Configuration
Configure NGINX to Use the PHP Processor
Now we need to configure NGINX to use PHP7 to serve our dynamic content.
sudo nano /etc/nginx/sites-available/default
You’ll want to look for this line and add index.php like I did in bold.
# Add index.php to the list if you are using PHP

index index.php index.html index.htm index.nginx-debian.html;
Next, you’ll want to uncomment (remove the #’s) in front of the php7.0-fpm.sock section, like this:
 # pass the PHP scripts to FastCGI server listening on 127.0.0.1:9000

        #

        location ~ .php$ {

                include snippets/fastcgi-php.conf;
# # With php7.0-cgi alone:
# fastcgi_pass 127.0.0.1:9000;
# With php7.0-fpm:
fastcgi_pass unix:/run/php/php7.0-fpm.sock;
}
You’ll also want to deny access to .htaccess file since NGINX doesn’t use them:
        # deny access to .htaccess files, if Apache's document root

        # concurs with nginx's one

        #

        location ~ /.ht {

                deny all;
Exit and save your configuration.
Now you can test it with this command:
sudo nginx -t
If you didn’t get any errors, then go ahead and restart the NGINX, PHP, and MySQL services:
sudo service nginx restart

sudo service php7.0-fpm restart

sudo service mysql restart


Good article.thanks!